Tuesday, July 31, 2018

Very productive day.

I took today off and got some work done today.  It was a beautiful day.  It was also very productive.  The first thing I did was build my third arm.  Putting some of my scrap lumber to use. 

Works like a charm.

It is puffing up like I had hoped.

This is how much a single roll covers.  It made a noticeable difference to the comfort inside.  It stopped all the heat radiating down from the roof.

I got a couple batts installed from the other roll as well.  

At that point I decided to mow the yard to let the sun get far enough behind the clouds, and since it is the last chance that I will .  At that point I decided to switch over to paneling.  I got the first piece cut and fitted.  Unfortunately the staples I bought to hang it with were in the truck.

Not sure why I installed the 2x4 for the kitchen light, it needed a box.  Unfortunately the box is supposed to cover a 2' span, but it didn't really reach.

Fortunately this is all it has to support.

The kitchen light cord is installed too.

It is supposed to be rainy the rest of the week, so I hope I will be able to finish the insulation.

Sunday, July 29, 2018

Dismal failure, but a nice day.

I started the day off pretty well.  It was a really nice day, warm but not oppressively hot.  I got a bit of a late start from sleeping in (you may have noticed that yesterday's post was posted at 4AM...  Oops).

I started off getting the last ceiling joist installed.  I have no idea why I didn't install it when I did the other ones.  First though, I had to clean the mouse nest out of there.


I sprayed the whole area down with pepper spray and got it actually installed.


One of the other things I actually wanted to do prior to winter and snow load was put a brace in at the joint for the ridge board.  That is now done.


I then spent a while trying to figure out how to actually install the insulation in the ceiling.  I tried a couple of different methods, most of which ended with the insulation on the floor and me being covered.  Good thing I had a mask on, it isn't nice stuff.  This was one of the attempts.  It just ended up dragging the board around. 


This was a common sight today.  The insulation falling into a pile.


After deciding I either need a second pair of hands or a brace to hold up the other end, I decided to move on to paneling.  That was even more failure.  For starters, I tossed my old plywood blade, so I had to make a trip to Home Depot to get another one.  I then spent over an hour trying to the blade changed.  I tried three different saws.  Turns out my nicest saw is a different size.


It is only 6.5".  Standard blades are 7.25"


I then tried the saw I had been using, but the bolt was rusted in.  After rounding that, I tried the worm drive saw.  The bolt on that is no long a hexagon either.  Three saws, and no way to cut plywood with them.  Grrrr.


After some handle extensions and PB Blaster, I finally got the blade changed on the one I had been using that had rusted up.  Unfortunately it involved a lot of beating, and I think I bent the arbor on it while doing so, it ran noticeably more wobbly.


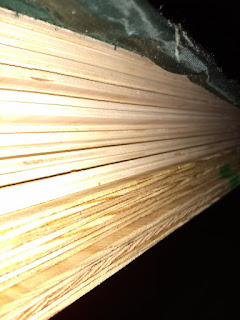
After that, I got the paneling all set up.  I decided to cut multiple sheets at once, it should help with the chipping and is more efficient. 


I also forgot why I got that saw in the first place: if the blade isn't thick enough, the saw won't hold it.  The blade will get stuck.  This compounded on the fact that I bent the arbor meant that cut took over a half hour to make.  Go an inch, back off, let it spin back up, go another inch, back off, etc.  The blade kept slipping, and you can see that it burned the wood a fair bit too.  I didn't have this problem with the ripping blade on it since the blade was thicker, and the carbide tips were enough wider than the blade (at least before my hammering on it today) that even with the little bit of wobble, the blade would spin freely in the cut.  That isn't true with a plywood blade.


I did dry fit one of the panels.  They fit nice.


Home Depot does sell blades for the nice saw, so I think I might just get some blades for that and use it.  Alternatively, I could swap the bolt out on the worm drive saw if I can get the existing one out, and keep that one running.  Either way toss the third. 

Not very productive day.

I got a late start, I apparently was tired from the week, and didn't roll out of bed until after double digits.  I also went up to look at a dishwasher.  It was a nice portable Maytag.  It was a portable one, but normally they are convertible, just remove the casters and the countertop, but this one did not appear to be convertible unfortunately, the dishwasher had to be disassembled and removed from the shell to remove the countertop.  I couldn't figure out how to remove the casters, but it was likely the same.  I suppose a hacksaw might work for the casters, but that could end very poorly for the countertop.  Oh well, they seem to keep showing up, I will get one eventually. 

After that I went up to get some work done.  One thing I have been monitoring is the mouse population in the house.


I didn't get too much done unfortunately.  I started with wiring in the lights.  They didn't take too kindly to 12 gauge wire, they were clearly designed for 14-16 gauge, but the clips appear to be holding and are making good contact.


I also tried to put up some of the insulation, but it turns out my stepstool is a little too short to be effectively used.  I thought I had a step ladder at home, but I can't seem to find it, but I do have a chair that I can use and will bring up tomorrow.

Around 330 or so another round of purple was coming in on the radar, so I decided not to wait it out up there.  I started on the design for the bathroom and the interior wall, created a BOM, and I did go and pick up the wood for the first part of the interior wall, I am going to use 2x3 for it, which is the minimum thickness required for electrical boxes.


Thursday, July 26, 2018

Lots of rain.

It was very very stormy today.  We got a lot of rain too.  A couple days ago, the creek was almost dry.


You can tell where the wind was coming from. 


I did manage to get the lights installed for the dining room and living room.


I intend to leave a little earlier tomorrow to hopefully get more time to do more.

Tuesday, July 24, 2018

Some odds and ends done for the ceiling.

Today was weird.  It was hotter than it was supposed to be, but it was still only in the 80s, it was just obnoxiously humid.  It wasn't terrible at the property though, there was a pretty steady stout wind.

I got these done.  These are the supports for the wiring so I don't have to staple a crapload of wires.


The first was a pain.  I put the wires in first and then tried to slide it up and install it.  That was a mistake.


I did the second differently.  This worked better.


Go figure, it rained.  Not a cloud above me.


Got the wiring done.


I then moved on to installing the light fixtures.  I quickly realized when I went to install them that I didn't have the trim pieces.  I might see if Mike Kelley has the other pieces.


I also installed the support beam for the kitchen light fixture.  This is just a light bar, similar to what you normally see in a bathroom.


At that point it was almost 8, so I went home.  Normally I get hungry before then, but apparently not today.  The light fixtures are started at least.
  1. Fix ruts in driveway.
  2. Put lights on the plow.
  3. Get the oil changed in the tractor.
  4. Get the tire chains installed and a weight installed on the back.
  5. Get the plastic installed
  6. Get the truck oil undercoated.
  7. Fix leaky underbelly.
  8. Get skirting installed.
  9. Find a way to run power that won't be damaged by snow/plow/snowblower.
  10. Find a way to prevent the snow pushing on the shed.
  11. Finish clearing off the slab.
  12. Run the rough plumbing. (includes gas line for stove)
  13. Install wall insulation.
  14. *Install flooring.  *12
  15. Install light fixtures.
  16. Install ceiling and attic insulation. *19
  17. *Install paneling  *13, 14
  18. *Install interior wall *14
  19. *Complete electrical and plumbing.  *17, 18
  20. *Install final flooring (carpet/whatever).  *18, 19
  21. Install interior fixtures.  When I get here, I will likely create a new list for the interior work.

Sunday, July 22, 2018

Sore day. Short update.

I unfortunately forgot my phone when I went up today, so no pictures.  I was quite sore, so I didn't get a whole lot done today.  I cut up a few pieces of insulation which are now ready to install for the ceiling.  I was lazy and didn't install them though.  I also did some measuring and design for the interior work. 


I am currently debating whether I should install the flooring and ceiling first or the interior wall.  It would be easier to do the others before the interior wall, but probably should come afterwards.

Unfortunately, it looks like my nice free ceiling fan won't fit, unless I can put it far enough inside to not be close enough to the door.  I am guessing that would require I put the fan inside a cabinet though.  Bummer.  I do have a backup light fixture though.

Saturday, July 21, 2018

Flooring complete.

Matt came up to give me a hand today.  We were originally hoping to complete the flooring and make a serious dent in the paneling.  Because of timing, we started with staining the paneling, since it took an hour to dry.  The stain was awful.  It was a lot more opaque that it was supposed to be.  It is expensive too, almost 10 bucks a can.  And it doesn't come even remotely close to the claimed 275 square feet.


We were applying it with rollers which isn't recommended, but there is no way I am going to manually stain 16 sheets of paneling.  I will likely end up just painting it.  Oh well.

The first panel was especially bad.  It was blotchy, and it was clear that it was too thick. 


The second was better, but still not great.  We actively tried to keep it as thin as possible. 


They didn't get better when they dried either.


We then got to work on the floor.  The last few pieces were more difficult than expected.  A ton of little cutouts in the boards.


This had fail written all over it.  I don't have a hole saw, so I cut it with the jig saw.


The floor is at long last complete though.


After finishing the floor, we grilled out.  Had some nice rib steak.  Unfortunately that is the last of my steaks; I have a couple pounds of ground and the heart left.  I might have to come down and restock.  At this point I am guessing I owe my parents a cow anyways.


I tried using onion soup mix as a rub.  It worked fairly well.  A touch on the salty side, but the flavor was good, without overpowering the meat.


As I was sitting taking a break, I noticed that the screen on one of the doors was falling out.  Anderson quality.


After Matt left, I did a lot of cleanup.  Most importantly is I got all the paneling inside.


Even though it is far too premature, here is a walkthrough of the place and how I plan to lay it out.  Unfortunately blogger has a size limit, so I really had to compress the video a lot and drop it to 720p instead of 1080p, but it still gives you the plan.  Note - if the video doesn't work, try again the following day.  Sometimes it takes a day or two for them to work right.  Dunno why.


It is supposed to wet and rainy for the the bulk of the next week, so the paneling will have to wait,  I will probably start on the ceiling insulation.  The floor though is another item checked off the checklist.
  1. Fix ruts in driveway.
  2. Put lights on the plow.
  3. Get the oil changed in the tractor.
  4. Get the tire chains installed and a weight installed on the back.
  5. Get the plastic installed
  6. Get the truck oil undercoated.
  7. Fix leaky underbelly.
  8. Get skirting installed.
  9. Find a way to run power that won't be damaged by snow/plow/snowblower.
  10. Find a way to prevent the snow pushing on the shed.
  11. Finish clearing off the slab.
  12. Run the rough plumbing. (includes gas line for stove)
  13. Install wall insulation.
  14. *Install flooring.  *12
  15. Install light fixtures.
  16. Install ceiling and attic insulation. *19
  17. *Install paneling  *13, 14
  18. *Install interior wall *14
  19. *Complete electrical and plumbing.  *17, 18
  20. *Install final flooring (carpet/whatever).  *18, 19
  21. Install interior fixtures.  When I get here, I will likely create a new list for the interior work.

Ready for Matt tomorrow

The first thing I checked was the gas lines.  The gas lines were good.

I then installed the standpipe.

The other major item was installing the source line wiring.  2 gauge wire is really obnoxious, but it is in.

These weren't made for 2 gauge, but they held.  They were the only clips I had that were even remotely close to large enough.

I should have plenty of slack.

The inside is all buttoned up.

I don't have quite as much as outside, but should be plenty.

It is all sealed up.

I also started to go around and chop off the excess foam.

At that point, I was running out of materials, so I went home, grabbed some grub, and went up to Home Depot.  I decided to go with the underlay as my paneling with a bleached stain.  I only got three cans which was all they had, so I will have to finish it after it is installed.  

I put a blanket on it to help protect it from the dew.

Matt is coming up tomorrow, so hopefully all this will be installed tomorrow.